This was a quick project. I needed a table lamp for doing my electronic projects as i felt that light in the room was not sufficient. First i thought of buying a lamp but after searching in online and local stores i could not find any lamp that would satisfy my requirement and budget.
So decided to make one on my own. The design of the lamp is pretty simple. For the light i am using nine 1W LED with heatsink. For construction material of the lamp i have used 18mm rubber wood board which was left from the TV Unit Project.
This board was cut into 0.5" wide sticks and glued together. The base of the lamp is a bit long to prevent the lamp from toppling over when the arm is fully extended forward. A good idea would have been to add some metal counter weight to base. To finish the surface have sanded the surface and applied 4 coats of water based PU.
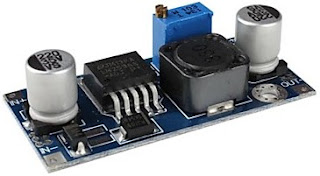
As the 3 LED are in series they can now stand max of 3 x 3.8V = 11.4V across them, To limit the output voltage from the DC-DC converter i have done a slight modification to the step down converter by connecting a pot in parallel with the existing pot and tuning the original pot to limit the maximum voltage. have also added a fixed resister in series with the regulator pot to limit the minimum voltage which now is about 8V.
The holes for mounting LEDs have been drilled with 25mm forstner bit. Initially i had made the holes free hand which resulted them being non perpendicular to the surface, To fix this i had to buy a drill stand and rebore the holes to correct them. The LEDs have been mounted in these holes with the help of hot melt glue.
To hide the wire i have cut a channel 2mm wide with my table saw which is the exact thickness of the table saw blade.

To control the lamp i have added an toggle switch to switch on and off the lamp and a regulator to control the brightness.
As a mounting plate i am using two 1mm laminate sheets which are glued together. On the surface of plate i have applied carbon fibre pattern vinyl wrap which give a good look to any surface. The panel is mounted to the lamp with 4 screws.
 All the arms are held by 3mm threaded rod which i have created by sawing off the heads of the 3mm screws.
Base is considerable wide and required a 100mm screw for other 2 joints have used 50mm screws with wing nut on both the sides. Wing nuts allow tool free tightening of the nuts as without proper tension the arms does not retain its position.
Though the end result looks decent enough i am not quite happy with the design i had played it very safe this time. The big challenge in this design was to hide the wires in the body this factor had greatly affected the design of the lamp.


0 comments :
Post a Comment